

GLUTEN-FREE PAVLOVA SNOWMEN
Here’s a mad idea for the little ones at your Christmas table … do-it-yourself Pavlova Snowmen.
Our idea is that you supply a big tray of different sized meringue disks and balls along with bowls of carrot noses, little eyes, buttons, hats and pompoms, all made from icing. Or use any commercially available decorations you like.
Add some interesting toothpicks for arms, a bowl of whipped cream and let the children go wild creating their own Pavlova Snowmen.
Too messy you think? Then they’ll be just as happy to be presented with these friendly little treats already dressed and ready to eat.
Rosie
PAVLOVA SNOWMEN
Makes around 12
120 gm egg whites (around 4 medium eggs), at warm room temperature
½ teaspoon cream of tartar
115 gm caster sugar
115 gm pure icing sugar, sifted
1 teaspoon pure vanilla extract
600 ml thickened cream, whipped for decorating
Fondant icing for decorating (Orchard brand ‘white icing’ is gluten-free)
Gluten-free food colouring for decorating
OR use purchased, gluten-free decorations
Fancy toothpicks to use as arms
Coloured cardboard for the hats
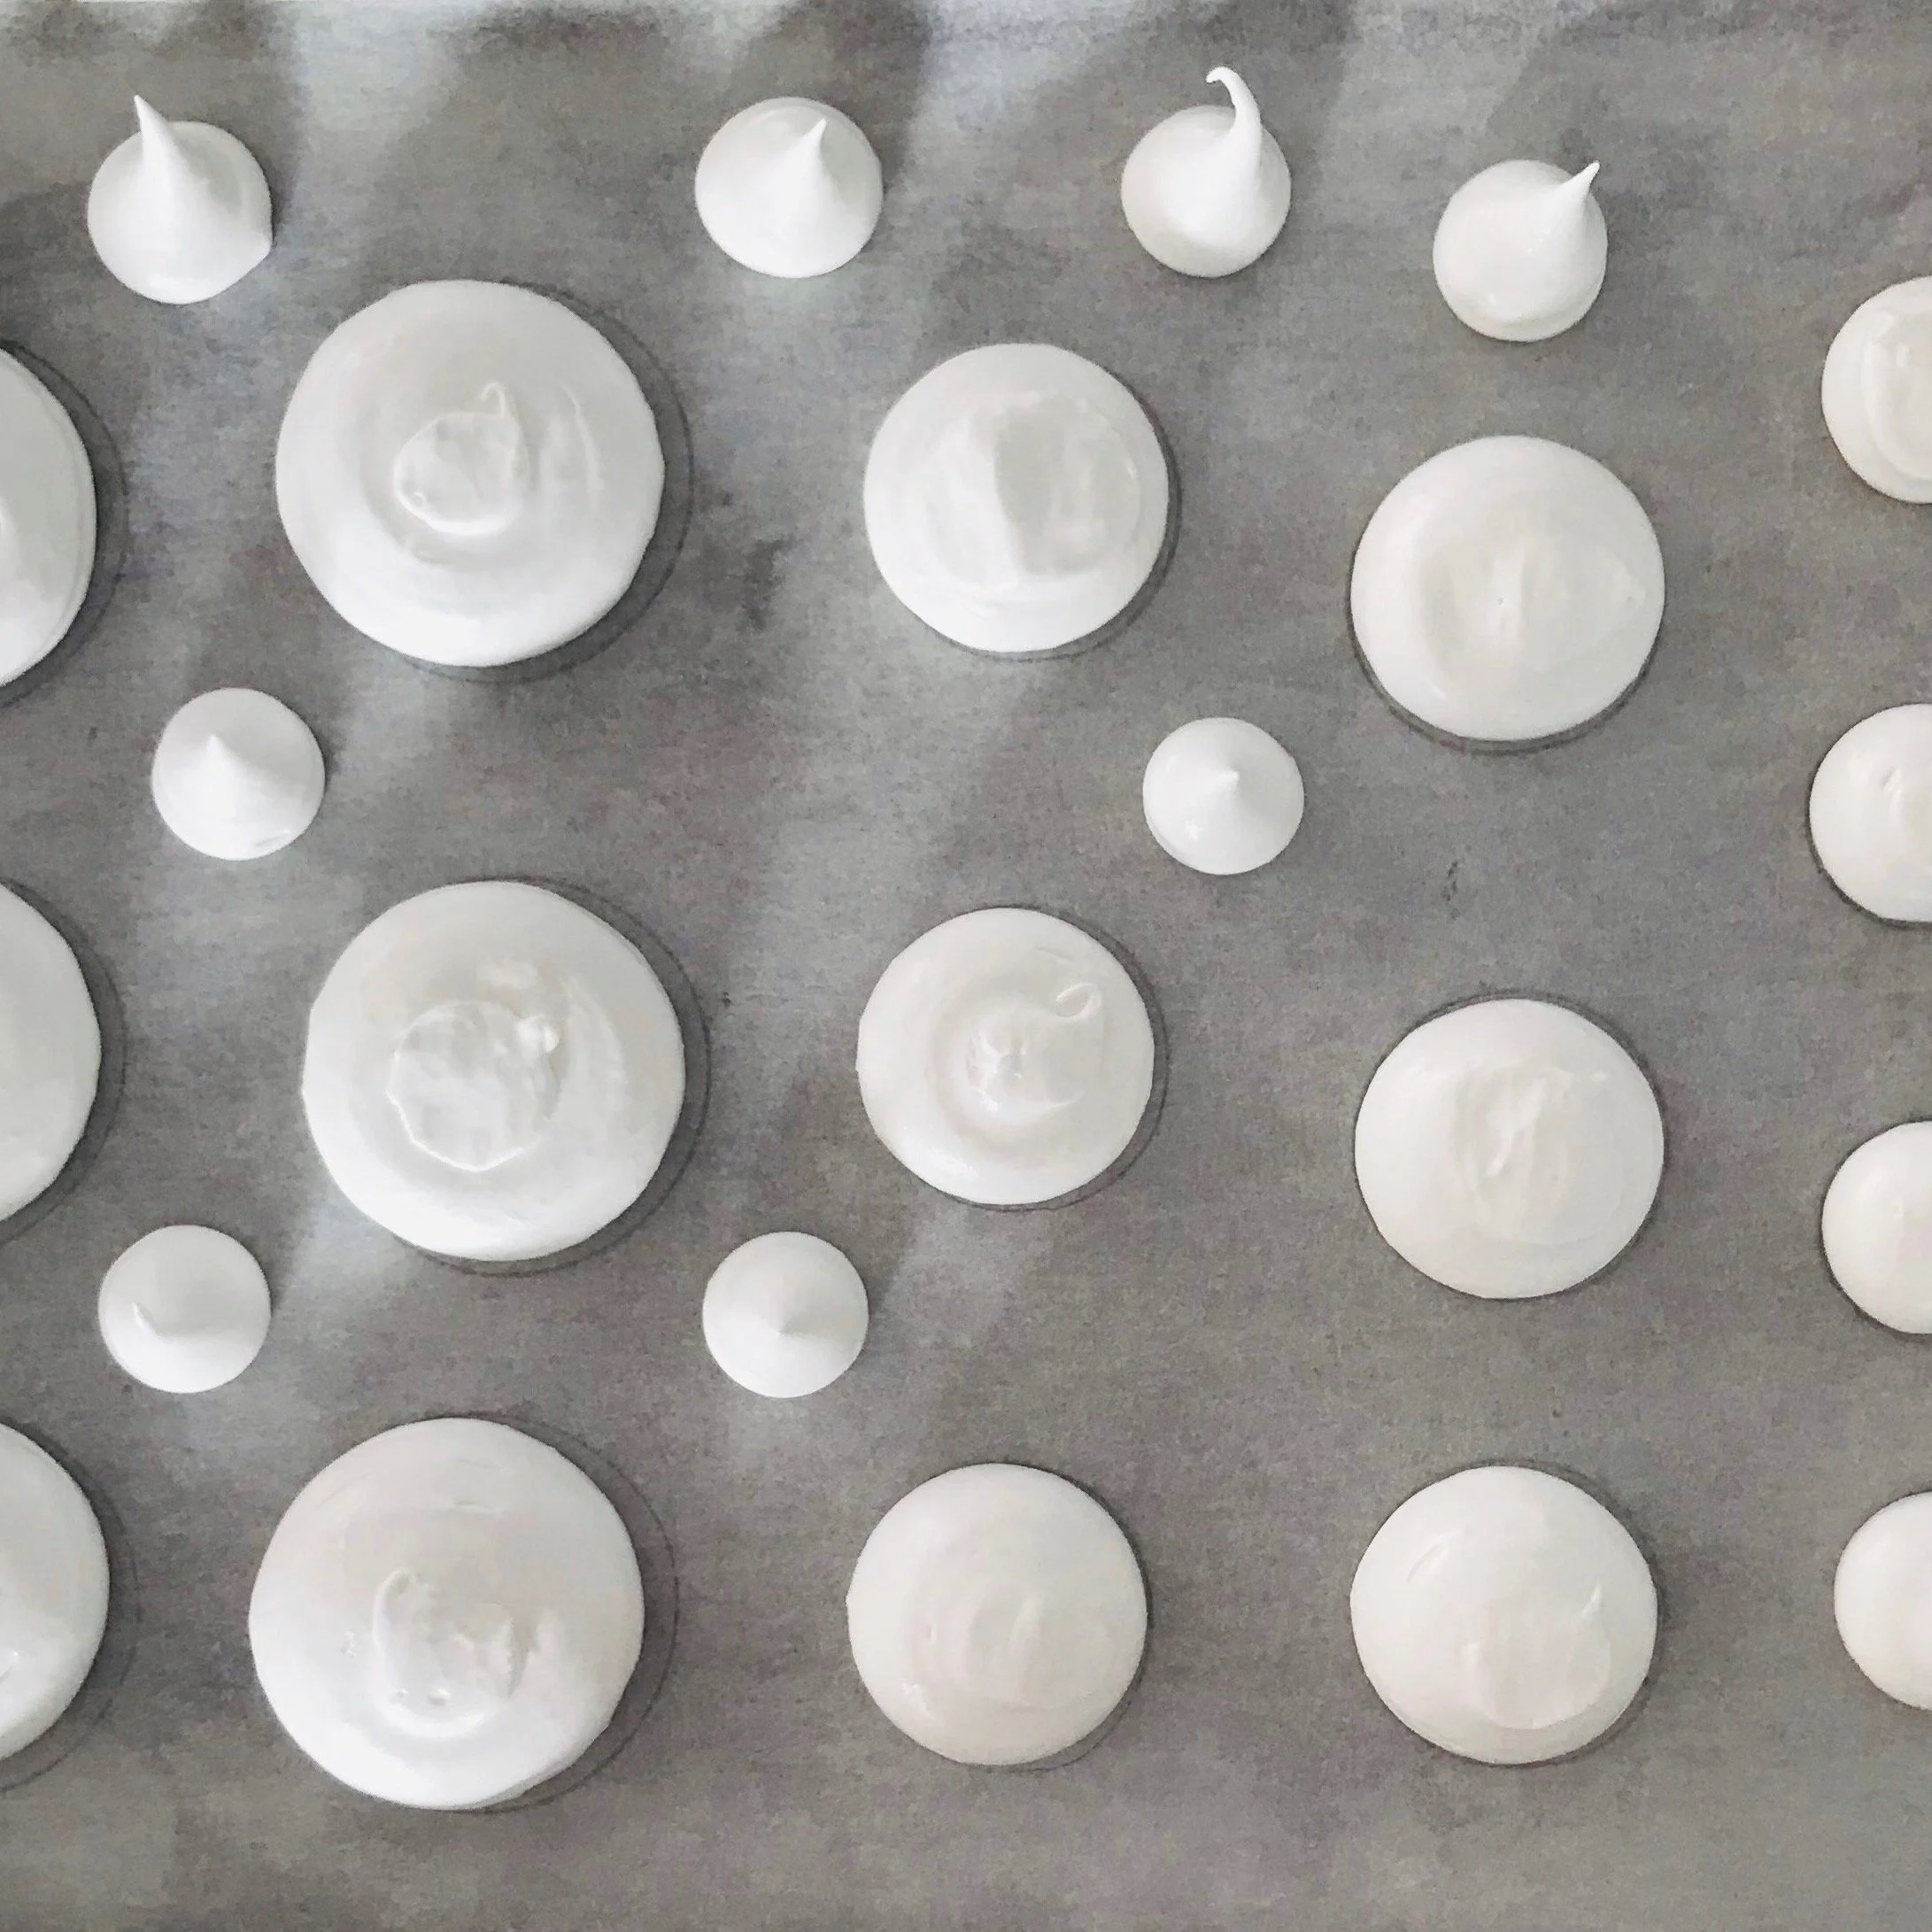
Preheat oven to 80°C fan-forced (100°C conventional). Line two oven trays with baking paper.
On to the baking paper, trace with a pen or pencil 12 x 6cm diameter circles, 12 x 4.5cm diameter circles and 12 x 3cm diameter circles. Turn the baking paper over to prevent any pen or pencil transferring onto the meringues. You will still be able to see the circles through the paper.
In an electric mixer, whisk the egg whites until foamy. Add the cream of tartar and whisk on medium speed while adding 2 tablespoons of the caster sugar. Whisk until soft peaks form when the whisk is lifted. Add a further 1 tablespoon of caster sugar and whisk on high speed until stiff peaks form when the whisk is lifted.
Gradually whisk in the remaining caster sugar and whisk for at least a further 3 minutes until the mixture is glossy and very firm.
Sift the icing sugar over the meringue mixture and gently fold in using a spatula. Fold in the vanilla extract.
Transfer the meringue to a large piping bag fitted with a 1.5cm nozzle (if using).
Holding the piping nozzle 1cm above the centre of each of the baking paper circles on your prepared trays, pipe the meringue until it reaches the circumference of the traced circles and is around 2cm deep.
Using a clean, damp finger, gently flatten the tops if necessary.
If you prefer to, simply spoon the meringue over the marked circles to a depth of around 2cm.
Bake for 2-2½ hours or until the meringues lift easily from the baking paper. Or you can remove a small amount of meringue from the centre of one of the disks with the tip of a sharp knife. If it is only slight sticky it will continue to dry at room temperature.
The meringues can be made weeks ahead and stored in a dry, airtight container in a dark place.
To Assemble
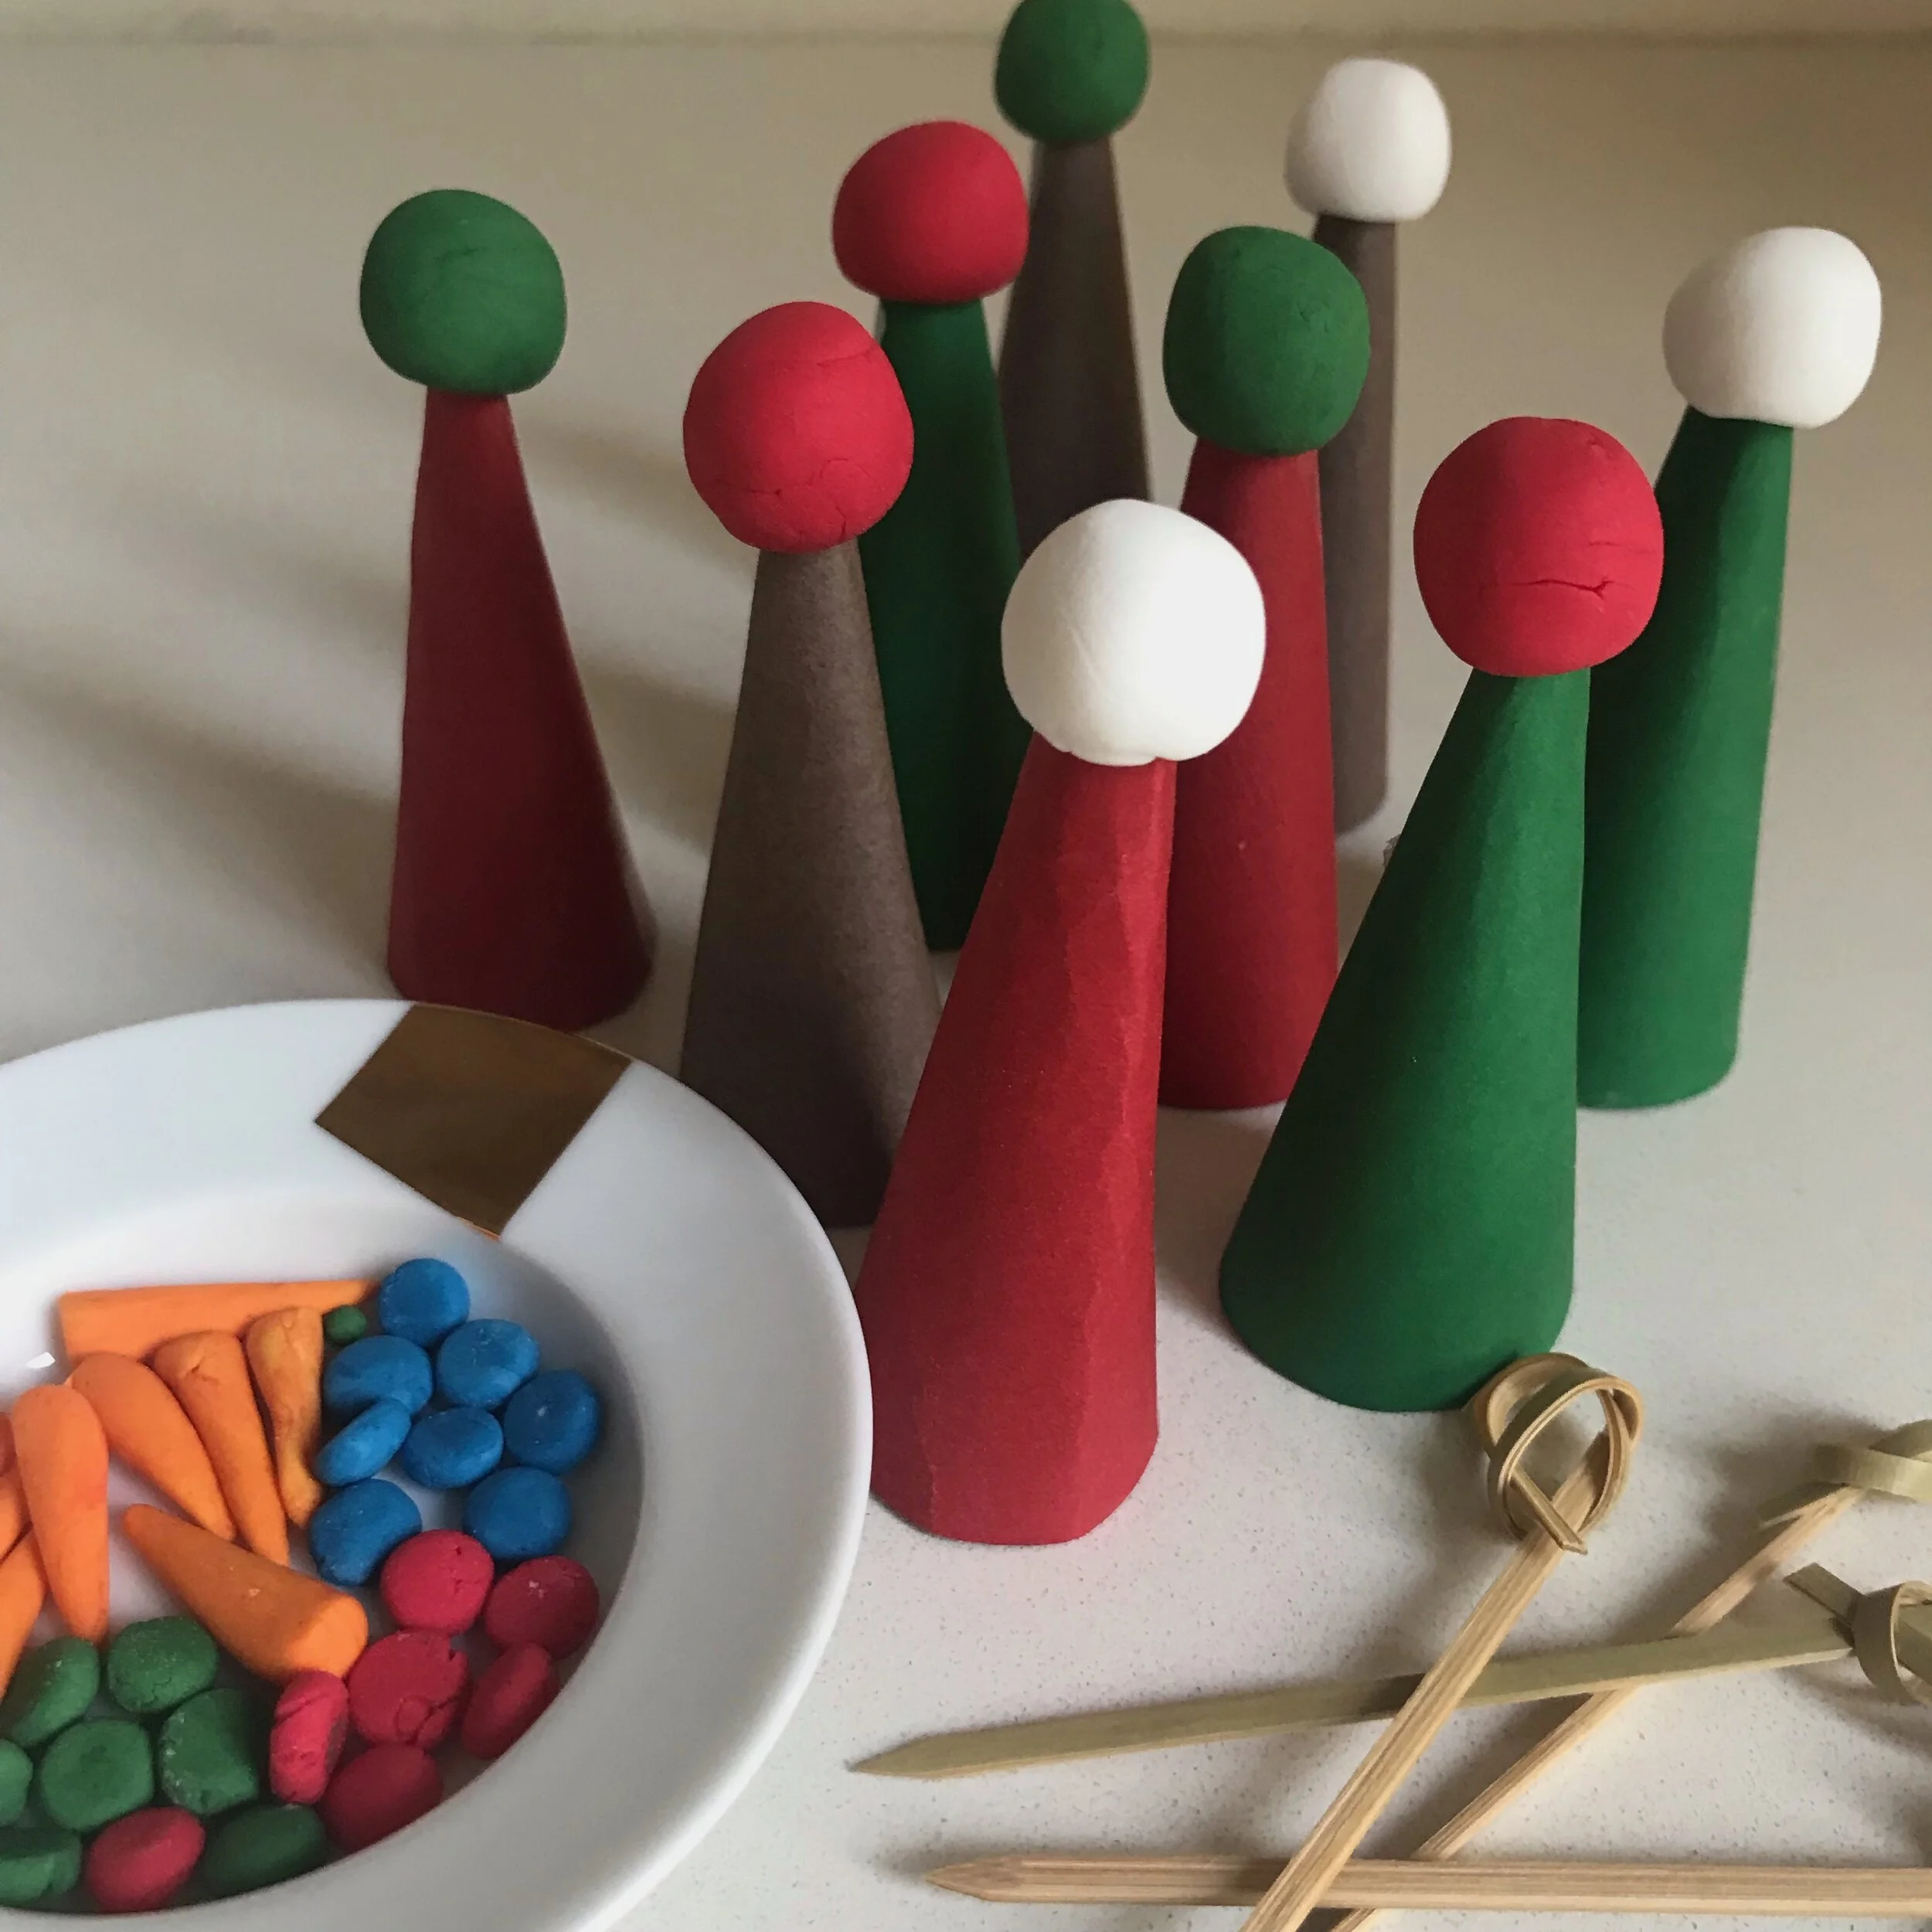
If making your own decorations, knead your chosen colours into small amounts of the white fondant icing and make tiny balls for eyes, disks for buttons, balls for pompoms for the hats and small, orange, conical shapes for the nose.
Roll out some icing in different colours and cut into long strips for scarves if using.
Cut out the hats from the coloured cardboard and secure with tape or glue. Attach the pompoms to the hats while the icing is still soft. This can be done days or weeks in advance.
The assembly is easier if the eyes, buttons and carrot noses are made several hours or even days or weeks ahead to allow them to harden. However, as the scarves need to be flexible, they will need to be rolled at the last minute. They are very optional.
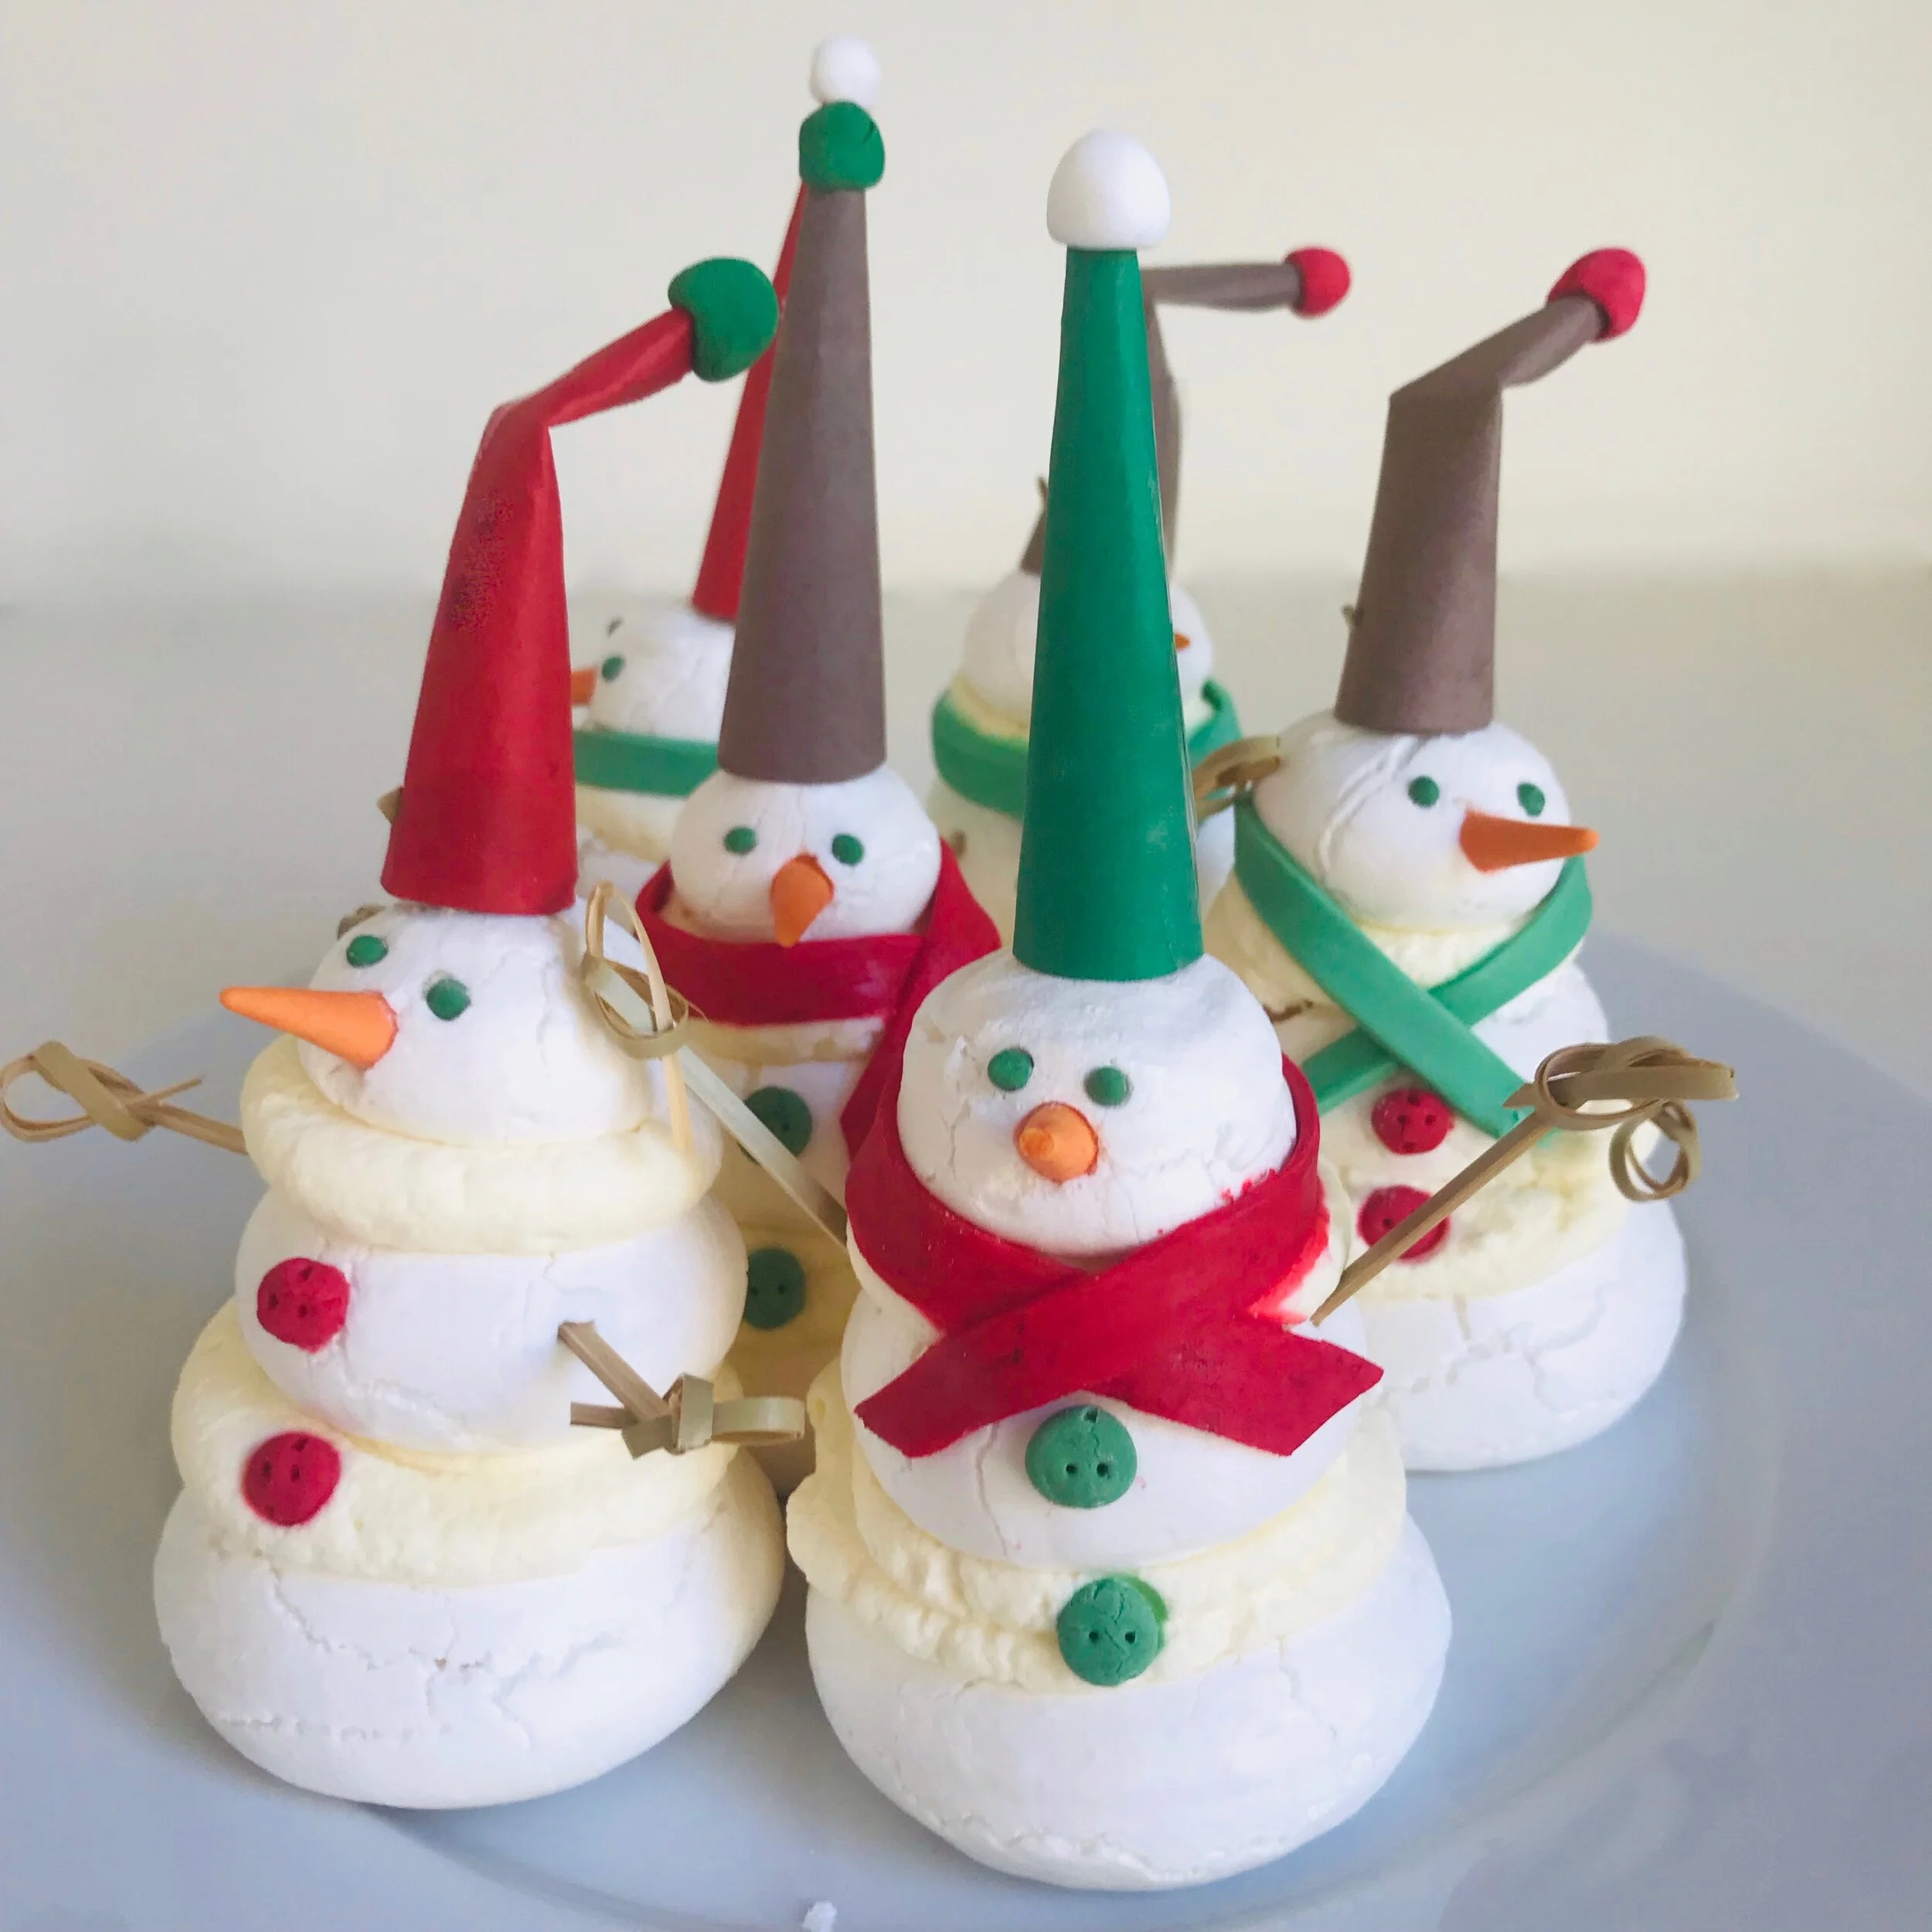
Working with the smallest of the meringue disks (which will become the heads), and with the point of a toothpick, gently make holes for the eyes and the carrot noses and insert them.
Secure the hats with toothpicks if they are not stable (just remember to remove the toothpicks before the children start to eat their snowmen).
Working with the middle-sized meringue disks, insert the toothpicks for arms. You may need to trim them if they are too long.
These steps can be done days or weeks in advance.
Place the largest meringue disks onto a large serving platter or onto individual plates. Pipe or spoon some whipped cream on top. Place the middle meringue layer, the one with the arms inserted, on top. Pipe or spoon some whipped cream on top. Place the head on top.
Secure the buttons to the meringue layers with a dot of whipped cream placed on the back of the buttons.
There will be some whipped cream left over.
The Snowmen can be assembled to this point up to 6 hours ahead, covered and stored in the fridge.
Lastly, just before serving, drape the scarves, if using, around the chilly necks of the snowmen and serve with a bowl of the excess whipped cream.
TIPS:
Purchased decorations will, of course, speed up the process.
We’ve made our own decorations to be sure they’re gluten-free, but if you can find gluten-free varieties, then all the better. If the little ones in your life don’t have any dietary issues, the whole world of decoration is yours.