
A GLUTEN-FREE WEDDING CAKE
We at the Coeliac’s Revenge love a party and a wedding offers the opportunity for a really big one!
Luckily for us then, after 32 years of a very happy union, Jan’s beloved dropped to his knee recently and proposed.
Along with frocks, food, flowers, fun and festivities, a wedding cake topped our list. A gluten-free wedding cake.
Jan and Anthony requested we try our hand at producing a wedding cake using their favourite Coeliac’s Revenge gluten-free Almond and Vanilla Cake, better known as the Frangipani Cake. And bless her, she worked like a dream.
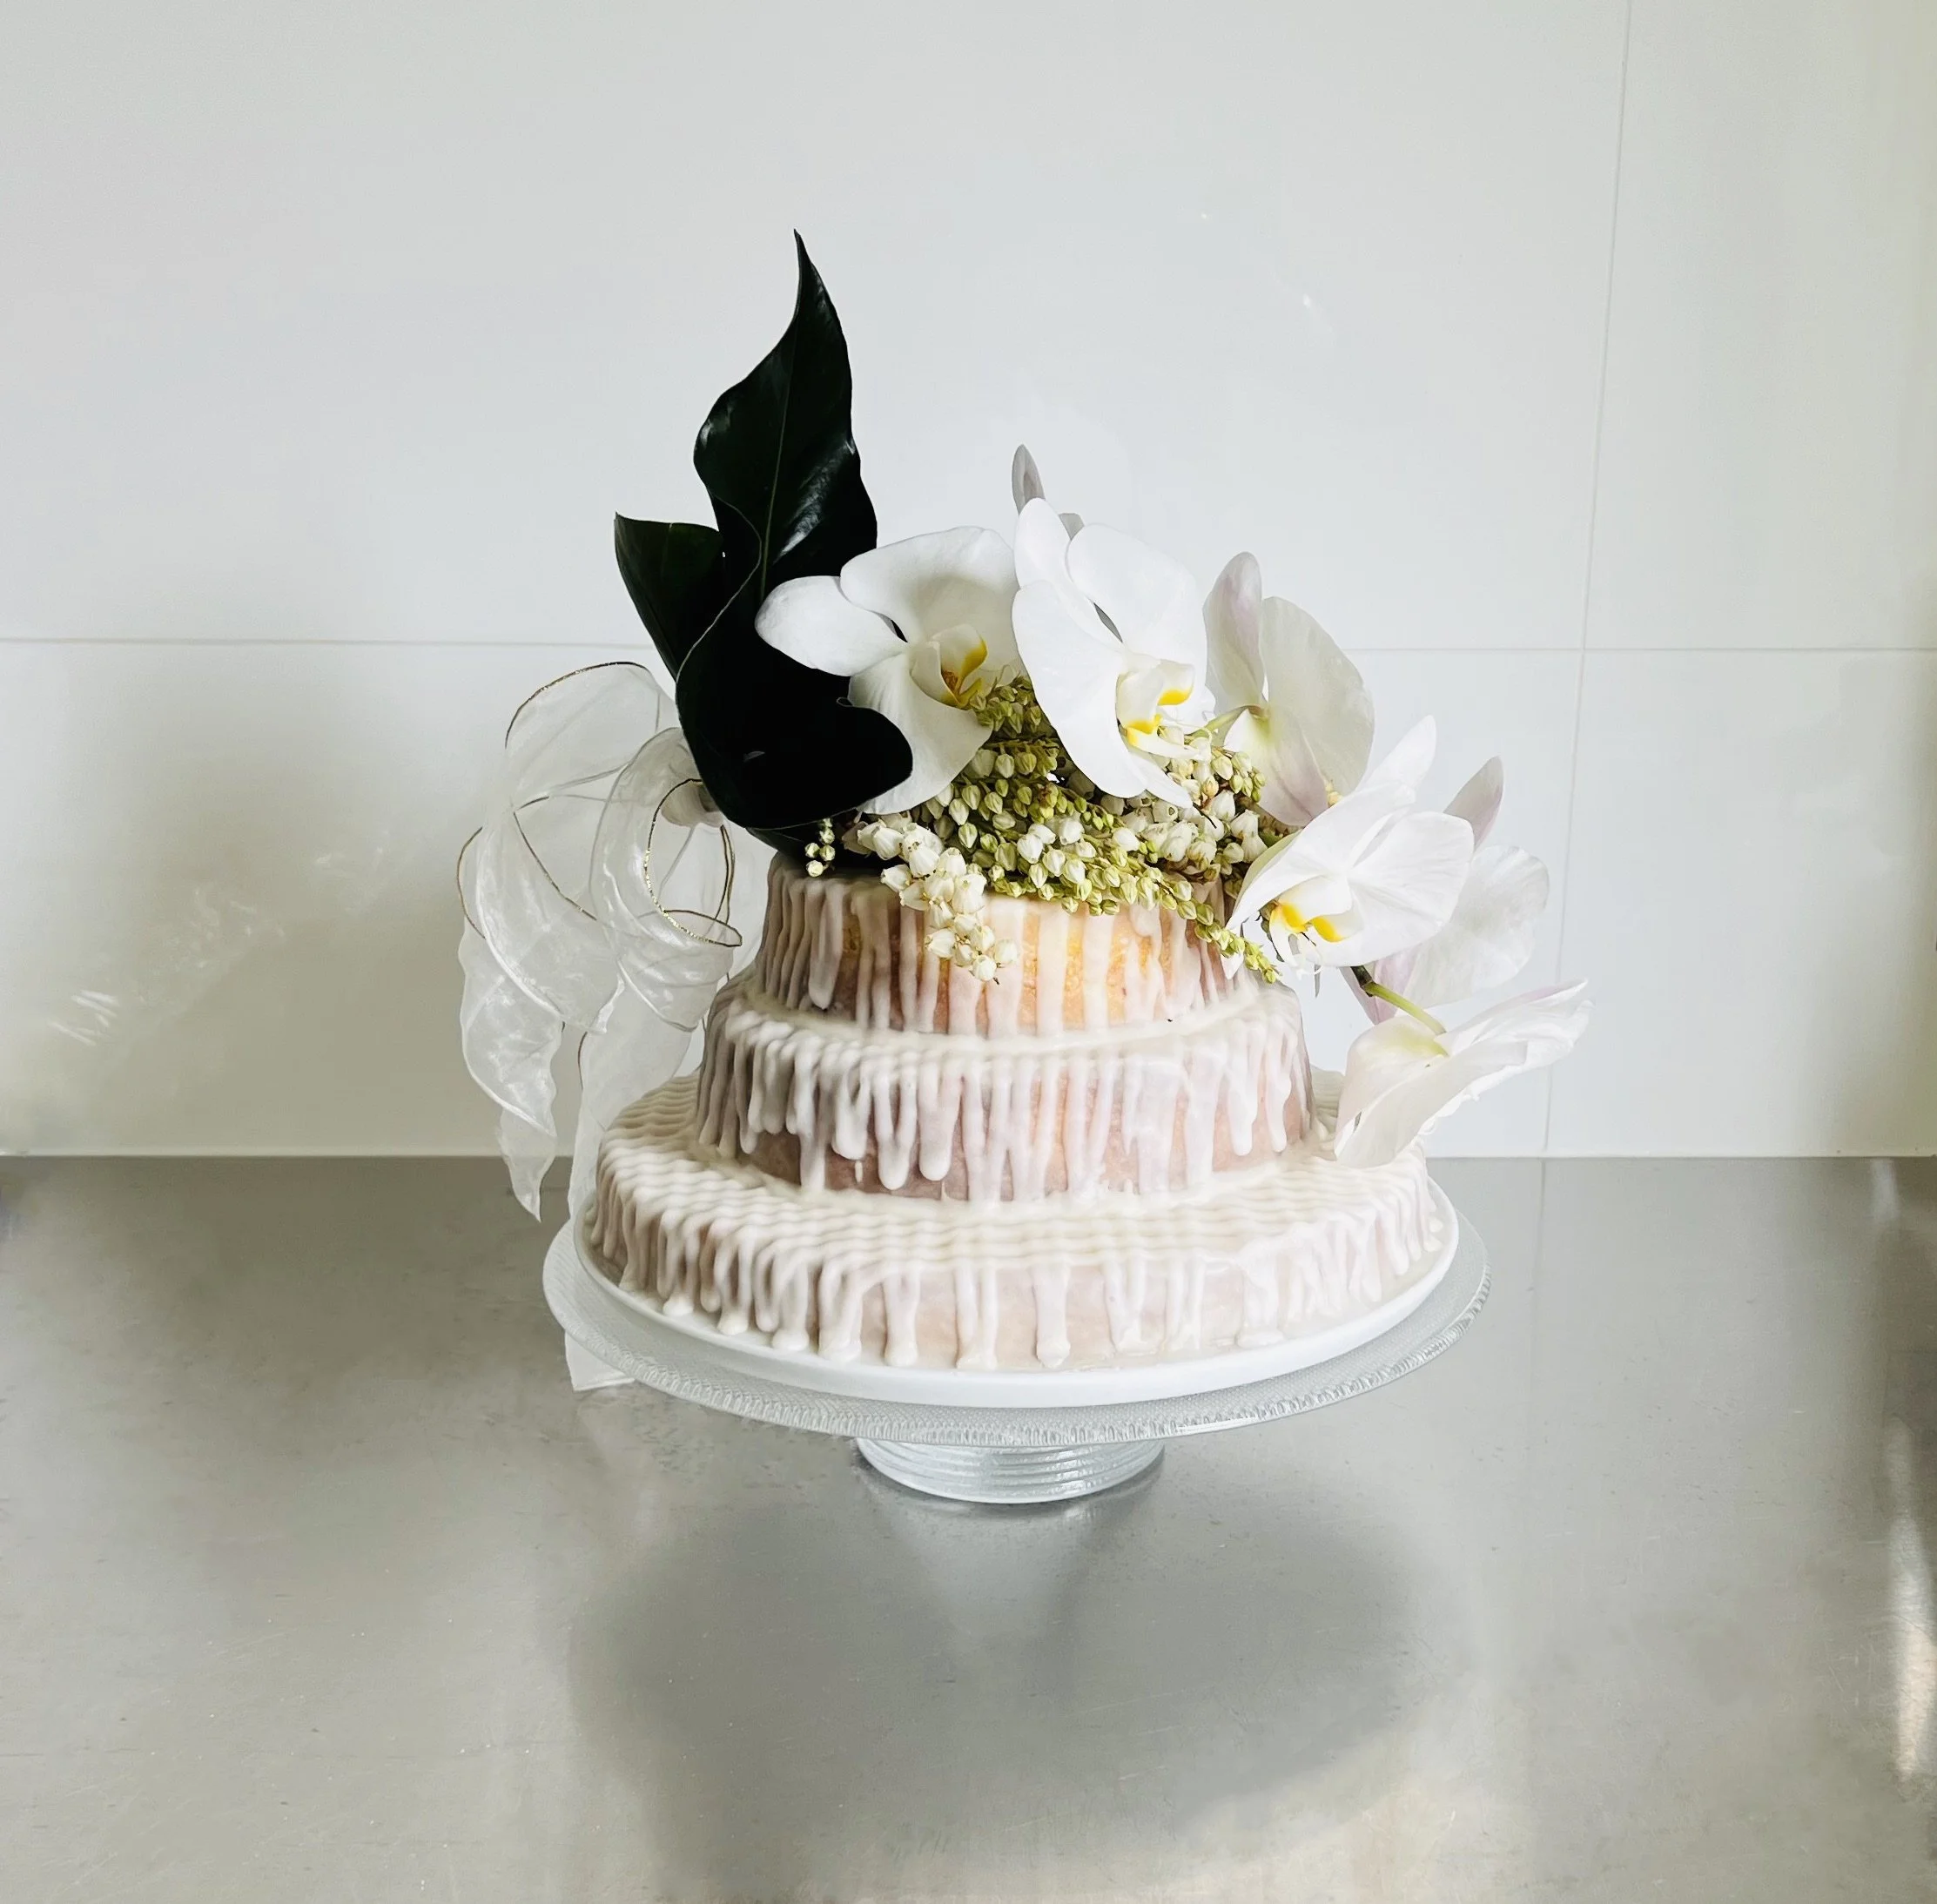
So here we present our first Coeliac’s Revenge Wedding Cake …. just in case you’re as lucky as Jan and Anthony.


FRANGIPANI WEDDING CAKE
Makes 80 – 100 x 3cm squares
You will need to make this recipe twice, in separate batches. The first in a 27cm-28cm round cake tin/ring.
The second divided between a 16cm cake tin/ring and a 20cm cake tin/ring, making sure the mixture is the same depth in both tins.
First Layer
420 gm ground almonds
425 gm caster sugar
400 gm whole eggs (approximately 8 eggs)
4 egg whites
300 gm unsalted butter, melted and cooled
4 tablespoons cornflour, sifted
1 teaspoon pure vanilla extract
Preheat oven to 160°C. For the first layer, grease and line a 27cm-28cm round cake tin with baking paper.
Place almonds and sugar in the bowl of a food processor and pulse until well combined. Alternatively place in a large bowl and combine well using a large whisk. In the food processor, with the motor running, add the whole eggs and egg whites all at once. Process for 30 seconds then transfer the mixture to a large mixing bowl. If not using a food processor, whisk the eggs and whites together, add to the almond and sugar mix and beat vigorously by hand to combine.
Gently fold in the cooled melted butter until completely combined. Sift the corn flour and fold into the mix then fold in the vanilla extract.
Transfer to the prepared cake tin/ring and bake for 50 – 60 minutes or until the cake is golden and a cake tester comes out clean. Cool in tin/ring before turning out onto the cake plate or board on which you are going to present the finished wedding cake. Ensure the top side of the cake is uppermost.
Second and Third Layers
Preheat oven to 160°C. Grease and line with baking paper a 16cm cake tin/ring and a 20cm cake tin/ring.
Repeat the above recipe and divide the mixture between the prepared 16cm and 20cm tins/rings ensuring the mixture is the same depth in both tins/rings.
Bake for 30-40 minutes or until the cakes are golden and a cake tester comes out clean. Cool in tins/rings before turning out onto cake boards, ensuring the top sides of the cakes are uppermost.
Levelling the Cakes
You will need to level the cakes before icing them. Using a serrated knife remove the rounded tops of the cakes to level them. Eat-up the removed bits before anyone else does. Brush off as many excess cake crumbs as possible.
Don’t worry if the first icing glaze layer has some crumbs in it, the second layer will cover them and smooth out the surface.
ICING GLAZE
The recipe below is enough to glaze 1 x 27-28cm cake with one layer of glaze.
For the wedding cake you will need to glaze each cake layer twice ensuring the first glaze is dry before applying the second.
You will need 1.5 times the recipe to glaze the two smaller cakes and the same again for the second glaze.
270 gm pure icing sugar
3 tablespoons water
½ teaspoon pure vanilla extract
Sift icing sugar into a small bowl and stir in the water and vanilla. Place over a bowl of hot water until the icing is tepid. It should coat the back of a spoon. Pour icing over the cake and spread it quickly over the sides and top.
For the crosshatching decoration, ensure the glaze on the cakes is completely dry then mix up 1.5 times the above quantity of icing glaze, using a little less water. Place in a piping bag fitted with a 4mm piping nozzle and pipe lines in both directions across the cake, allowing the icing to extend down the sides of the cakes.
Allow to dry completely, preferably overnight, without allowing any covering to come into contact with the cakes. Wire cake domes are perfect.
To Assemble the Cake
The first layer of the cake should be on the cake plate/round on which you will present the finished wedding cake.
Use a palate knife to loosen the 20cm layer from its cake board then place on top of the first layer. Repeat with the 16cm layer.
The cakes are sturdy enough not to need any support in between each layer.
There may be a small gap in between the layers and if so, mix up a little of the icing glaze, keeping it quite stiff but still pliable enough to pipe.
Transfer to a piping bag fitted with a 4mm piping nozzle and pipe around the bottom edge of each of the top two layers, filling in the gap.
To Serve
We served the cake cut into 3cm squares and offered it, to be eaten with fingers, on platters. We dismantled the layers using a metal spatula and cut each one into the 3cm squares. The left-over, rounded edges were quickly demolished by handy on-lookers. Served in this way, the cake yielded 80-100 x 3cm squares – we lost count – it was a busy day.
TIP:
The cakes can be baked up to a week ahead of time and stored in the fridge. Bring back to room temperature before icing.
The iced cake will keep in the fridge for 3-4 days. Bring back to room temperature before serving.