
In planning our blogs for Christmas this year we thought that the traditional European Yule log might be nice for the dessert. Often referred to as a Bûche de Noël, after the French version, it is a fun cake to make and loved by all who like chocolate (everybody).
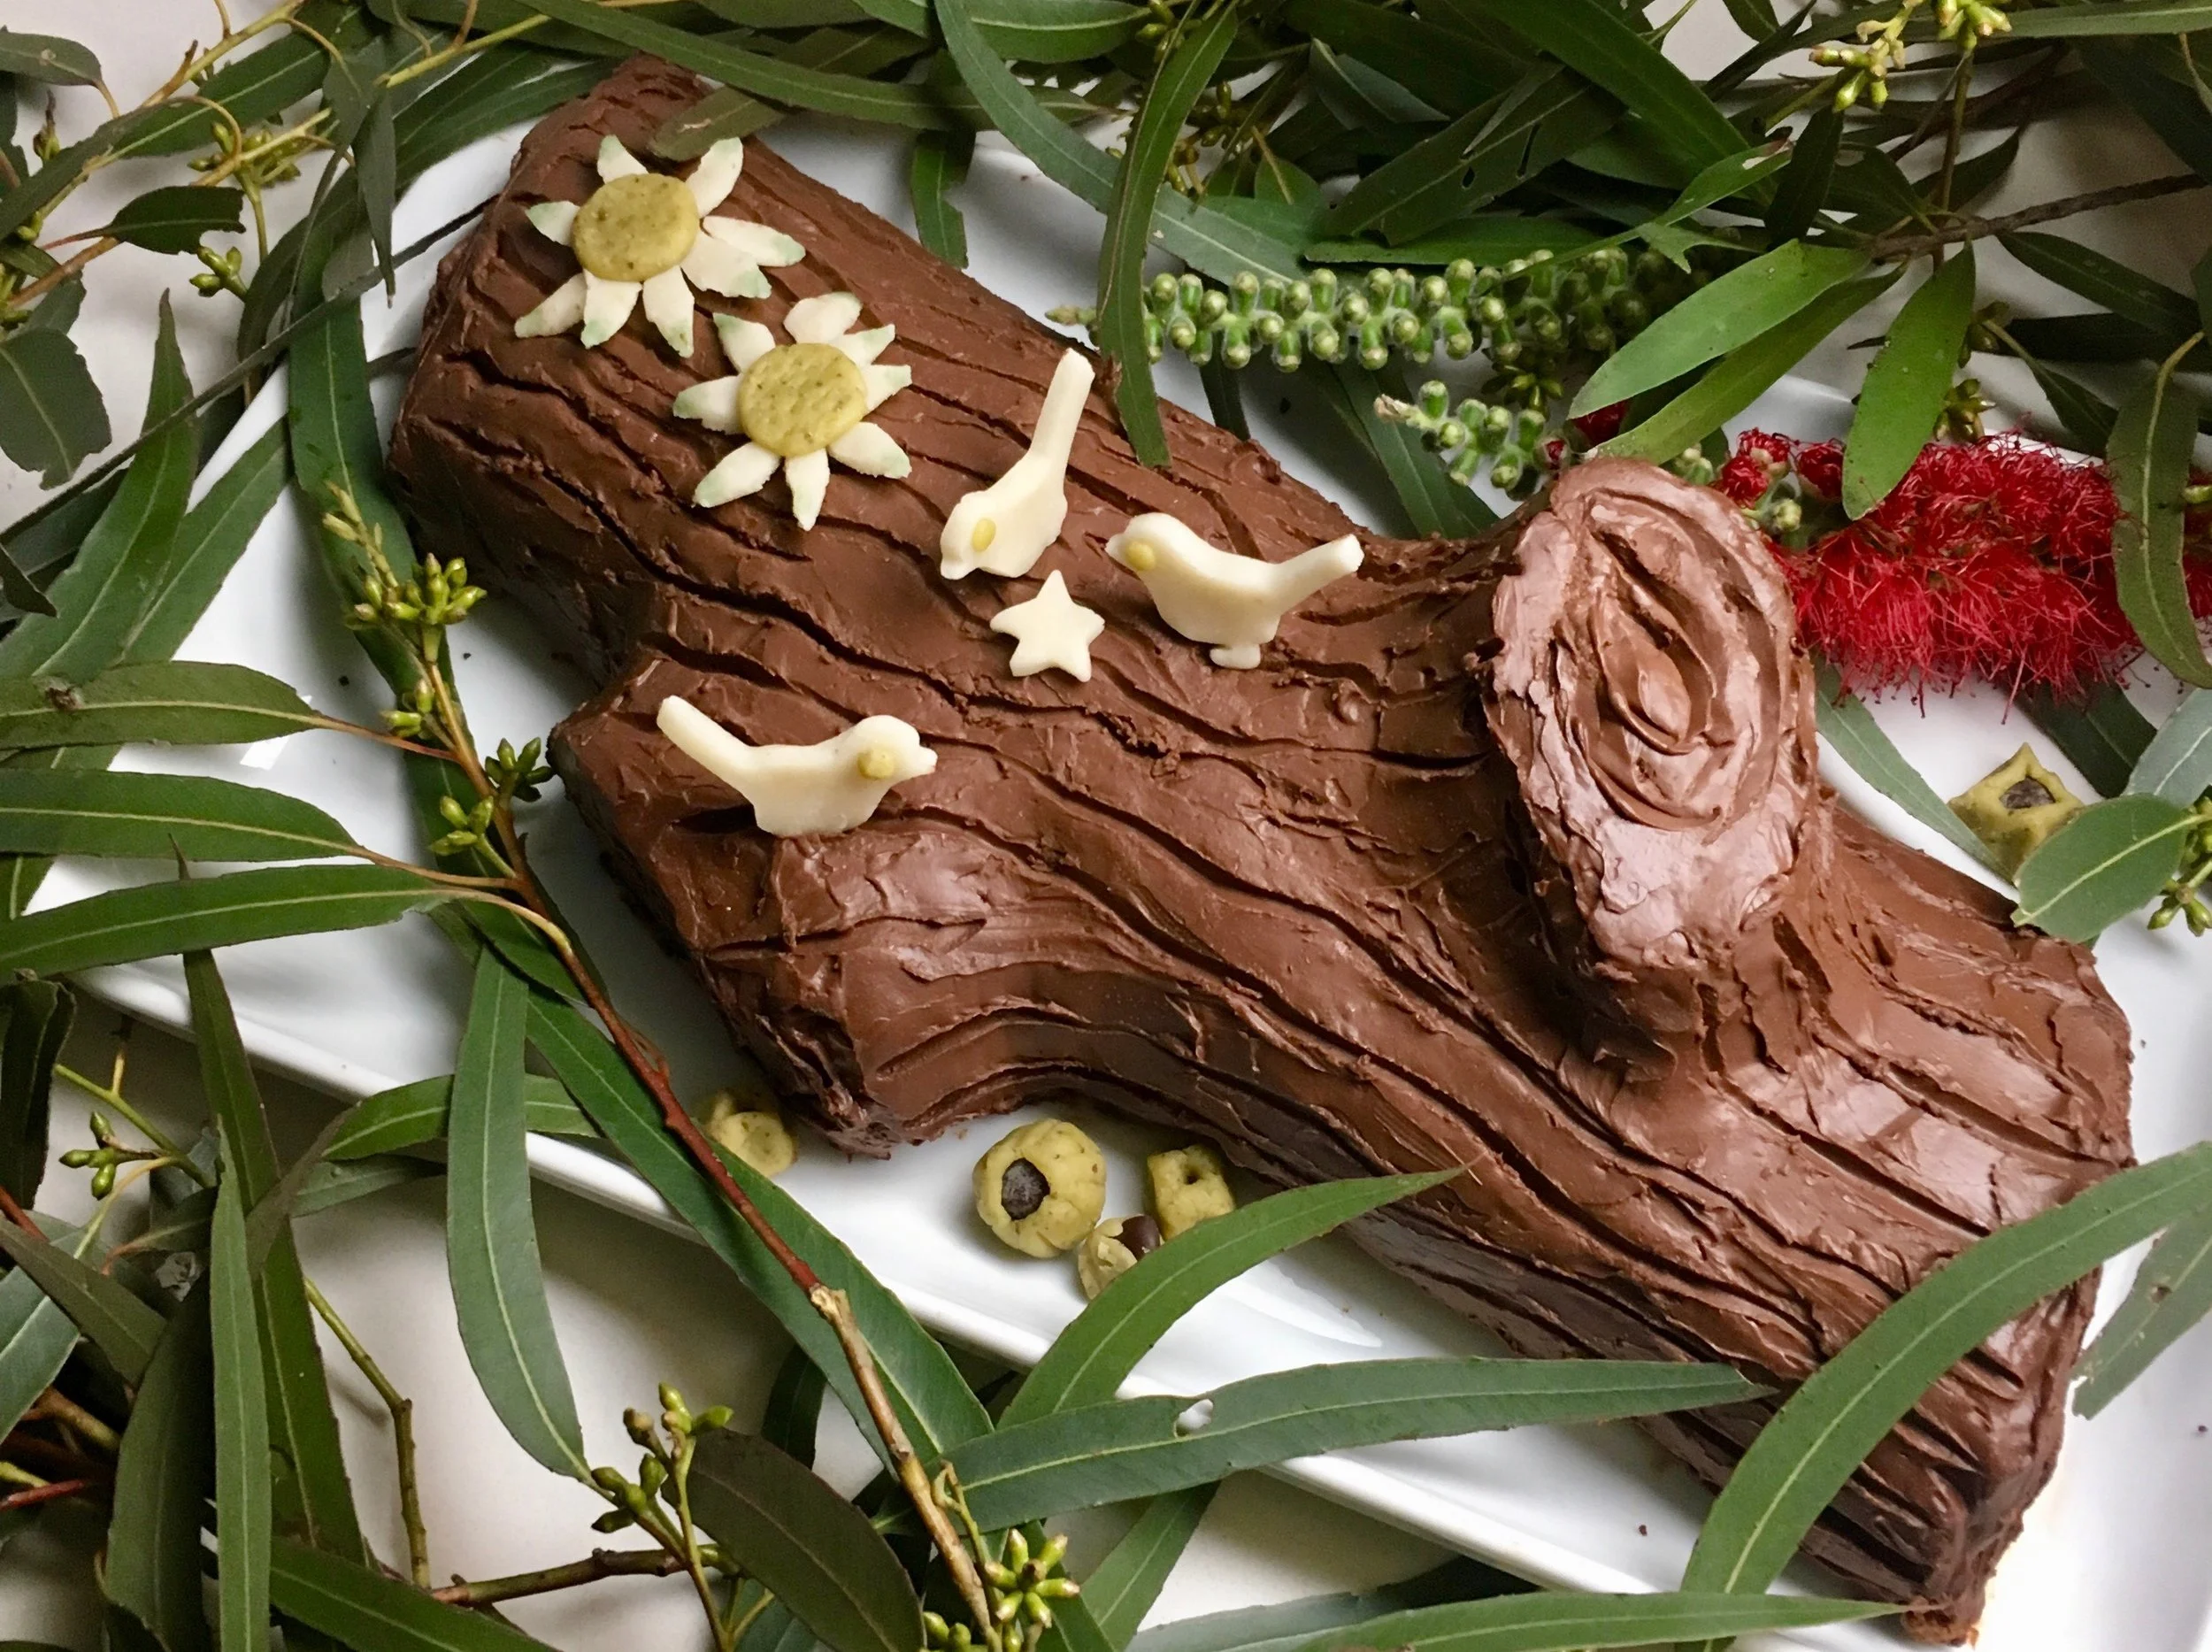
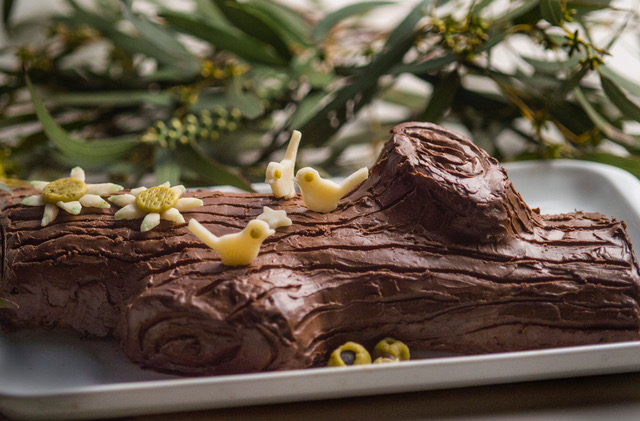
So I set myself the challenge and found that it really wasn’t that hard at all. It is basically a very light, rolled chocolate sponge, filled with cream and covered in a rich chocolate frosting. I was keen though to make a local version with Australian floral decorations. We came up with our own name for it too - a Bush Noel.
So get yourself organised and make some of the components ahead of time so the assembly is not left to the last minute. And go mad with the decorations, either fashioned from our Almond Marzipan and Pistachio Marzipan or anything you fancy, to make your own version of our Bush Noel.
Caren

BUSH NOEL
Serves 10-12
Start this recipe at least 3 days ahead.
The marzipans, if using for decoration, can be made a month ahead at least; the frosting 2 weeks ahead; the sponge can be baked and the whole cake assembled 3 days ahead.
1 Dark Chocolate Frosting recipe
1 Chocolate Sponge recipe
1 Whipped Cream Filling recipe
½ Pistachio Marzipan recipe, optional
½ Almond Marzipan recipe, optional
Berries to serve
Dark Chocolate Frosting
350 gm bittersweet couverture chocolate buttons, 58% cocoa butter, roughly chopped
385 ml cream
Process the chocolate buttons in a food processor until very fine.
Bring the cream to boiling point and, with the motor running, pour through the tube onto the chocolate. Continue to process for a few seconds until smooth.
Transfer to a glass or ceramic bowl to cool completely before using. The frosting can be covered tightly with cling wrap and refrigerated for up to 2 weeks.
Bring back to room temperature or warm in a microwave for 4-5 seconds before using to coat the cream-filled sponge.
Chocolate Sponge
115 gm bittersweet couverture chocolate buttons, 58% cocoa butter, roughly chopped
80 gm caster sugar
6 eggs (average weight 60gm), separated
¾ teaspoon cream of tartar
1 tablespoon Dutch processed cocoa
Preheat oven to 175°C. Grease a 40cm x 25cm Swiss roll pan and line with baking paper.
Put the chocolate buttons in a small, heat-resistant bowl and place over a saucepan of barely simmering water to melt the chocolate. Ensure that the water does not touch the bottom of the bowl and that no water touches the chocolate. Cool before using.
In an electric mixer beat the egg yolks and just 50gm of the sugar for 5 minutes until light and fluffy. Add the cooled chocolate and beat until combined.
Whisk egg whites until foamy then add cream of tartar and continue to beat until soft peaks form. Gradually add the remaining sugar and beat until stiff peaks form.
Gently fold the whites through the chocolate mixture. Pour into the prepared pan and spread evenly with a spatula. Bake for 15 minutes.
Meanwhile wet a clean tea towel and wring out all the water. Remove the sponge from the oven and leave in the pan. Immediately dust over the cocoa and cover with the damp towel. Allow to cool completely before assembling the Bush Noel.
Whipped Cream Filling
300 ml pouring cream
1 tablespoon caster sugar
1 teaspoon pure vanilla extract
In a chilled bowl whisk all the ingredients until soft peaks form.
Marzipan Decorations, optional
Use our Almond Marzipan and Pistachio Marzipan recipes to create bush–themed decorations. Using a small rolling pin or small glass bottle, roll pieces of chilled marzipan into 3-4mm flat sheets and shape into leaves and other decorative motifs.
We were inspired by May Gibbs’ Snugglepot and Cuddlepie for our Bush Noel decorations. Alternatively create your own decorations.

Assembling the Bush Noel
Place a new piece of baking paper approximately 44cm x 28cm on the kitchen bench, with the long side facing you.
Remove the tea towel and slide the cooled Chocolate Sponge, still on its baking paper, off the baking pan. Place it with the long side facing you, on top of the new paper. Spread the Whipped Cream Filling over the cocoa-covered sponge.
Roll the sponge into a long log and ease it off the paper as you proceed, with the use of a spatula if the sponge is sticking to the paper. Roll it onto the new paper. At this stage the log may tear in places but this is not a problem as all tears will be covered by the frosting. Don’t lose your nerve when rolling the log - it is fine to use a bit of pressure to form it. Transfer the log on the new paper to a baking sheet and refrigerate for at least an hour.
Meanwhile remove the frosting from the fridge and allow to come to room temperature before using. If necessary the frosting can be warmed for 4-5 seconds in a microwave.
Remove the log from the fridge and transfer it to a serving plate, sliding it off the paper as you do so. Diagonally cut a small section from each end and replace the pieces to suggest the beginnings of branches.
Use a narrow spatula to spread the frosting over the log then smooth and score the surface to resemble the bark of a tree. Not all the frosting may be needed but ensure a small amount is kept aside to repair any decorative detail if required later. Refrigerate until 1 hour before serving.
The Bush Noel can be stored in the fridge, loosely but completely covered with cling wrap, for 3 days at this stage.
Decorate with pistachio marzipan leaves or gum nuts, and almond marzipan flowers etc if using. Otherwise the log can be decorated with fresh gum leaves, Australian Christmas bush or Christmas bells. Or anything you like really.
Serve diagonal slices with seasonal berries.